
ALBUM | DIY PROJECTS | GEAR | MOTR | PODCAST | VIDEO ART | VISUAL ART | PHILOSOPHY
Flutter has the Pittsburgh EP 360 case for her Eurorack system. It’s a beautiful case made of hardwood with a lid, and it’s convenient for road travel. Much more manageable than the wedgie cases I made last year.
I really like the Pittsburgh Modular cases, but don’t have $900 in my budget to acquire the EP360. Since Flutter has a legit case, this allowed me to inspect the build closely. I took measurements, priced out all the materials, and a week later had a passable replica of this great modular synth travel case.


Project note:
This is a guide showing how you can build a quality case for a fraction of the cost, but this is not intended to dismiss the value of an actual Pittsburgh case. Build a couple cases yourself, and you will begin to respect the price associated with these. Pittsburgh cases are worth the price.
I wouldn’t dare make a business of selling my own cases. This guide is purely for the budget conscious, DIY-minded individual. Some may frown upon this, but cutting costs help allocate resources towards MOTR too.
The spirit of DIY is finding ways / different ways / new ways / any way that works for you and your goal, no matter the limitations.
Take these notes and use them as a guide to finding your own way.
APPROXIMATE COST: Under or around $200 (with plenty of hardware material left over to put toward a second case)
APPROXIMATE TIME: 10 hours (spread over 1 week)
Basic measurements to remember:
120HP is 24” inches
3U front panel is 5.1” inches tall
3U row in the case will be 5.16” inches
9U = 15.5” inches
Note: There is some conflicting information about the standard measurements. I can confirm these measurements are accurate for this project.
INSIDE BOX DIMENSIONS (where the modules go)
24” inches width
15.5” inches length
4.5” inches depth (bottom)
2.5” inches depth (lid)
Note: The lid is .5” smaller than the Pittsburgh EP360. This was done intentionally to lighten the case while providing enough space to close the lid with a patched system.
OUTSIDE BOX DIMENSIONS
25” inches width
16.5” inches length
5” inches depth (bottom)
3” inches depth (lid)
For this project, I used two 24” x 48” x 1/2” inch birch plywood from the local hardware store. This stuff. It’s not as good as the hardwood that Pittsburgh uses. However, this is still decent quality, yet cost-effective and stains nicely. With this wood, my finished case with size adjustments is about 10 lbs lighter than the Pittsburgh case.
I’ll also recommend using a table saw to ensure square and precise cuts. You’re building a box with a lid, so measurements as close to exact as possible will maximize your end result. Even if you don’t have access to a table saw, you can still do this with regular power tools. Just take your time and make straight cuts. Do what you have to do to make it work.

If you are successful, you should have something that looks like this.
The cuts
2 pieces - 25” inches x 16.5” inches
(top and bottom panels)
2 pieces - 25” inches x 4.5” inches
(front and back panels to bottom)
2 pieces - 25” inches x 2.5” inches
(front and back panels to lid)
2 pieces - 15.5” inches x 4.5” inches
(side panels to bottom)
2 pieces - 15.5” inches x 2.5” inches
(side panels to lid)
Assembling the box and lid
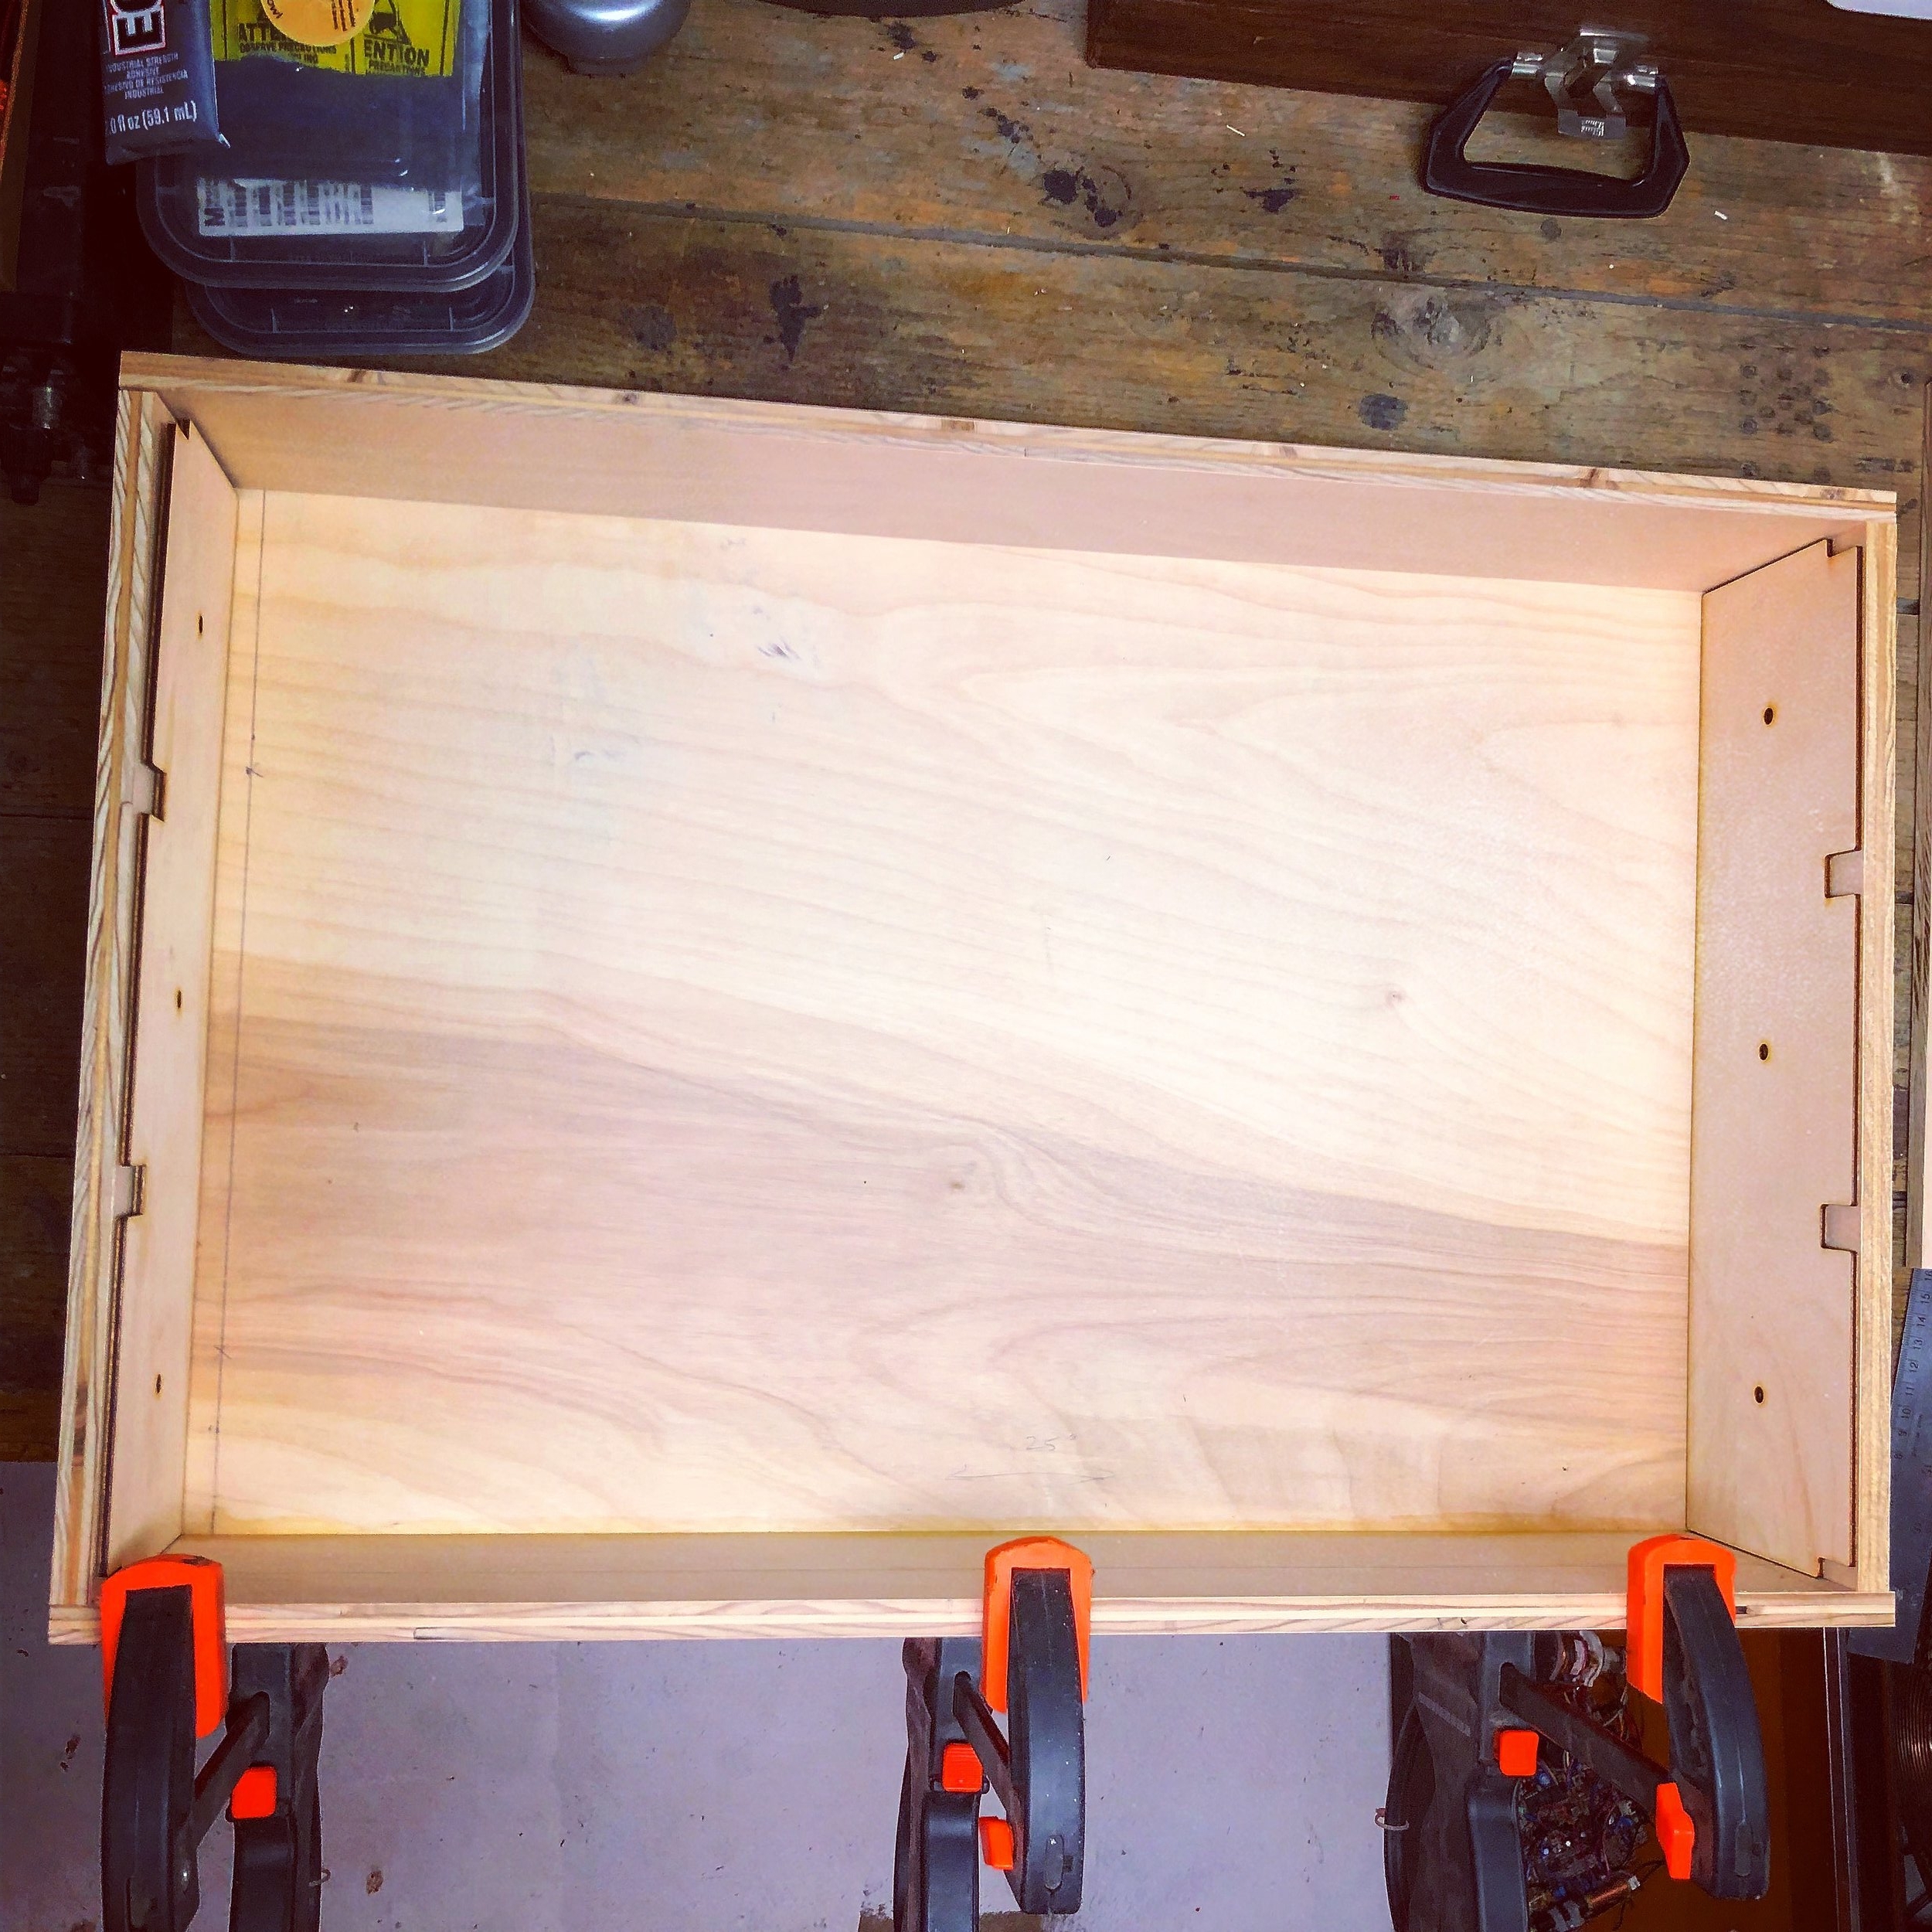
Glue and clamps, that’s it! I didn’t use any nails in this. With the glue and the hardware, everything will stay secure. Take your time on this piece making every angle is square and clamped down tight. Allow enough time for each section to dry before moving on to the next section.
The inside box dimensions are what matters most. Any overlap on the outside edges will be sanded down. Once all the pieces are glued in place, check to make sure the bottom and lid set nicely together when closed.
Sand and stain
Next step is to sand the surfaces smooth, mostly the outside. I recommend using a particulate mask while doing this. All the outside edges and corners need to be rounded. If you have access to a router, you should use it. I didn’t have one and just used a 5” orbital sander for the whole project. For the edges and corners, take your time and work the whole area simultaneously. I used 100 coarse grit to work fast on the edges and corners. Be mindful of sanding down any areas where the wood glue may have smeared. Your stain won’t take properly to those areas unless you sand them down.
After the first pass of sanding, I then used 220 very fine grit as a final pass to prep for the stain. Don’t focus on one edge or corner too long or you may accidentally sand too much in one area. This is an overall sculpting process, but use whatever works best for you.


Reliable Hardware
That’s the name of the company I purchased the hardware from - "Reliable Hardware." I used Amazon because I have free shipping with Prime, and Reliable sells their products directly through Amazon.
Now, I don’t need to go into great detail about placing the hardware. If you've gotten this far, you can handle the rest.
This is what I used:
1 strap handle (purchased in pack of 2)
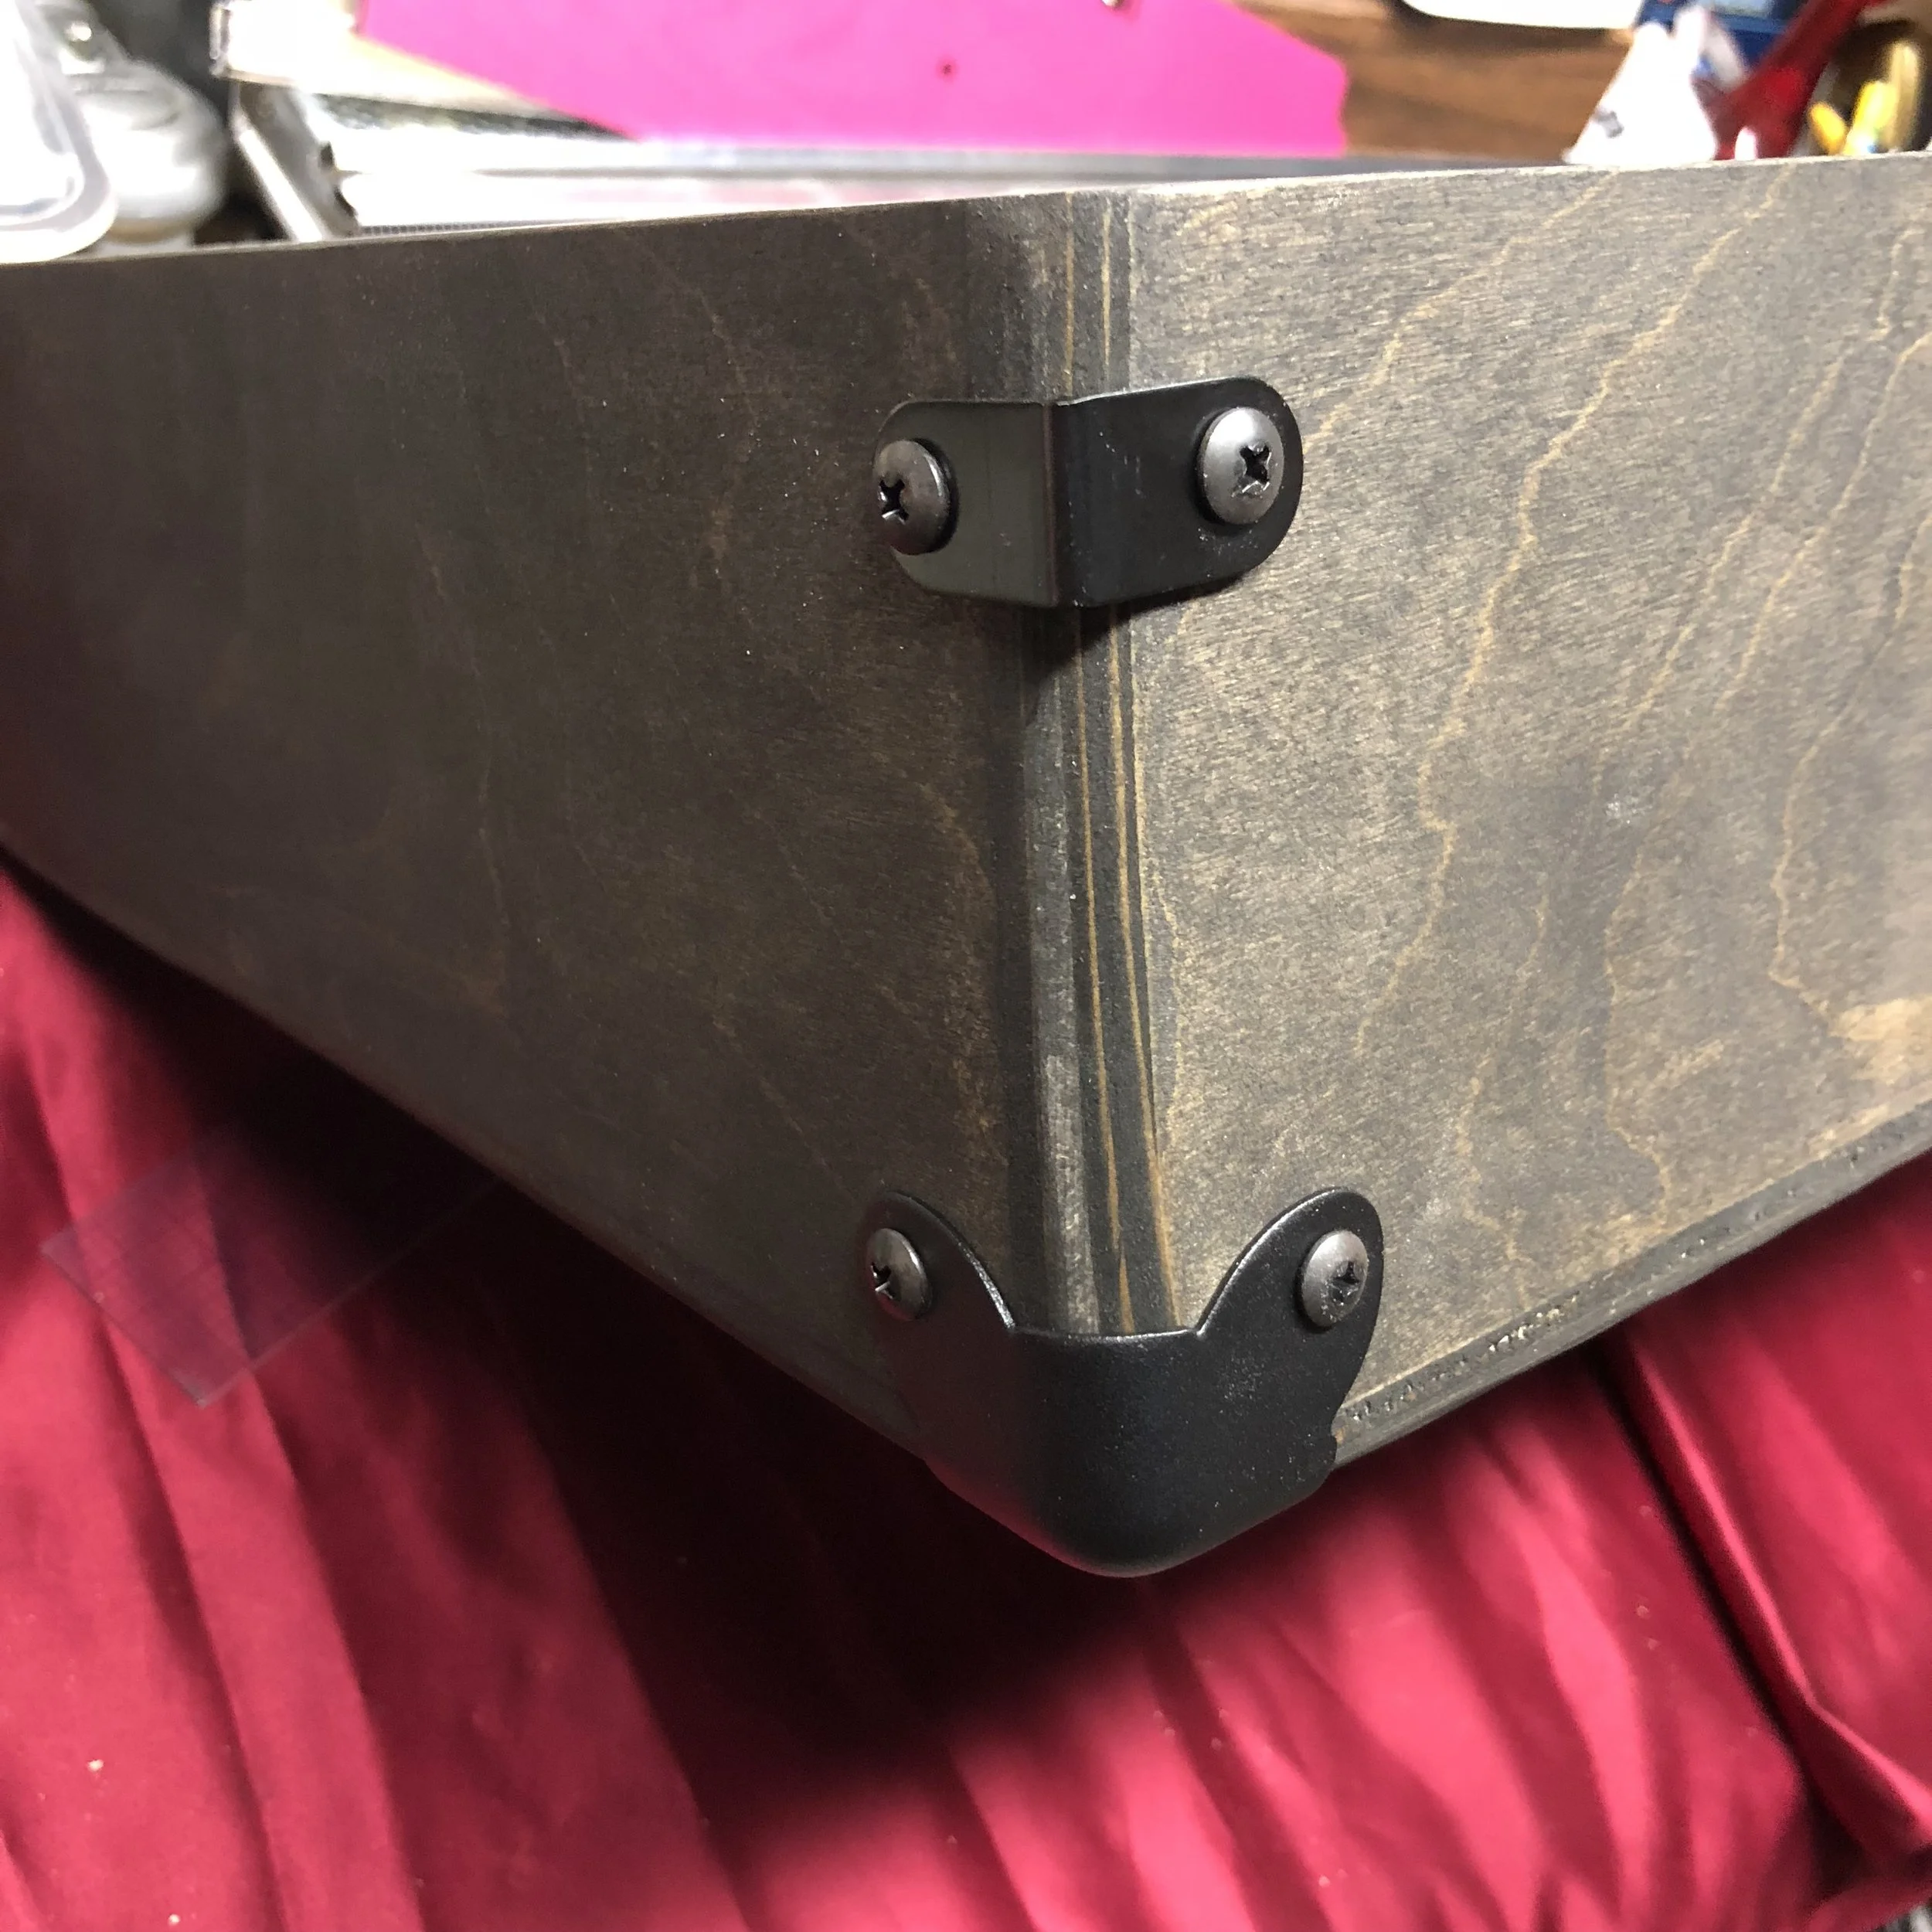
8 cabinet corner braces (purchased in pack of 8)
8 L corner right angle braces (purchased in pack of 20)
2 black take apart lift off hinges (purchased in pack of 2)
2 butterfly latches (purchased as single items - get 2)
4 .562” inch thick black rubber feet (purchased in pack of 8)
6 .82” inch thick black rubber feet (purchased in pack of 8)
54 1/2” inch black wood screws (purchased in pack of 50)
6 3/4” inch black wood screws (purchased in pack of 100)


Rails
This is my major money saver. You could go to Digi-Key and purchase T-STRUT vector rails if you like. The TS300 vector rails will work, and you can cut them down to 24” inches. You can use 2.5mm threaded strips or sliding nut inserts. All that adds up fast, and for 3 rows of 120HP, you’re looking at an additional $120 cost.
I now use screen window framing for all my projects that require rails. It’s under $4 for 7ft lengths, and you can get it in several different colors (black, white, brown, silver). You’ll need to cut 6 2ft strips for this project (total of 12ft). So, $8 and BAM! Use that extra money to buy a new module.
To mount the rails, I designed and laser cut side cheeks with slots so the rails could rest securely in the correct position for each 3U row to be 5.16” inches. Then, I used my favorite adhesive to glue them into place.
Note: Save gluing them into place for the last step. Don’t do that until you’ve mounted and wired your power supply and distribution.
(Insert link to vector file for the side cheeks.) If this link isn’t active yet and you need the file, send us a message.


The holes
Just mark and drill as needed. Use a 2mm drill bit and your regular 2.5mm screws will go right in and stay secure. 3mm screws work also, but you may need to use a bigger bit. Test it out first and see what works best.
Power
Proceed with caution! In this portion, I decline to specifically outline how you should wire up your system. With this project, you will be working with appliance wire and mains. Instead, I will share this Muff Wiggler thread that I used to figure it out. In addition to online research, I also have some experienced friends to consult at my local synth shop.
Please don’t be stupid. Ask for help if you need it. That said, it’s not very difficult. Except for any bonehead moves, you should be safe. However, you are working with main power that can potentially kill you.
This is what I used:
1 IEC power inlet switch (You can find these cheaper on eBay or AliExpress in packs of 5.)
2 Meanwell RT-65b switching power supplies
4 BusBoards of your choice. Send us a message if you need help or advice. Generally, these can cost $10-$40 each. It depends on whether you go full DIY - either from a kit or sourcing your own parts. I had all the components on hand already and just bought Synthrotek BusBoard green PCBs for $10 each. It was a lot of soldering, but my cost was $60 total for the BusBoards. Molex adaptors and cables will add to that cost for this solution.
If you don’t want to deal with all that, Modular Synth Lab has a great package deal here for about $100 including shipping. You could save yourself the headache of excessive soldering.
You will also need screws and spacers to mount everything down.
Power and distribution is NOT something you want to skimp on and cut corners. DIY it correctly or just purchase a pack and be done with it.
Find your best configuration for placement, mount it down and wire it up! Make sure that your main wires are not exposed. I used shrink tubing to protect mine.


Here is the finished result! One of these cases cost $900 and the other cost $160, plus time and labor.

Which one is which?
Now Flutter and I can play with matching cases. This also helps maximize cargo space when we travel. The old wedge cases have been repurposed for the MOTR synth.


I hope you've found value in this info. If you have any questions or want to chat about your project, send us a message. Also, please sign up for our periodic newsletter where we share updates of our adventures with art and synthesizers.
Cheers,
Z


ALBUM | DIY PROJECTS | GEAR | MOTR | PODCAST | VIDEO ART | VISUAL ART | PHILOSOPHY